All You Need Is Canned Coconut Milk To Whip Up Some Delicious Cream
Every worthwhile dessert often benefits from a generous helping of whipped cream. There is nothing like enjoying another slice of apple pie or more than one freshly baked pecan pie bar when these mouthwatering treats are loaded with homemade sweetened cream. Yet, whipped cream is not a versatile food for all dessert lovers, especially for those who consider themselves dairy-free. Nowadays, you can find an array of packaged plant-based whipped cream alternatives at your neighborhood grocery store, yet there is truly nothing like homemade whipped cream straight from the bowl. Luckily, with just a simple can of coconut milk, you can make your own plant-based whipped cream right in your home kitchen.
Unlike coconut cream which is thicker and higher in fat or cream of coconut which is a blended mixture of mashed coconut and sugar, coconut milk is simply shredded or pureed coconut mixed with water. This unsweetened cream-like substance is typically found in the international aisle of your nearest supermarket. Just one can of this coconut-based liquid, along with some powdered sugar and vanilla will lead to one sweet and dreamy plant-based topping. As long as you follow a few necessary steps, you'll have a homemade dairy-free whipped topping in no time.
Temperature maintenance is crucial when making coconut whipped cream
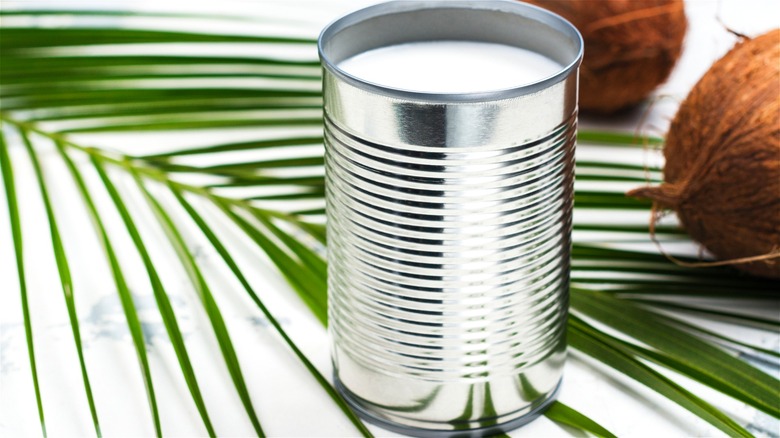
Now that you know the difference between coconut cream and coconut milk, getting this dairy-free liquid to firm up and transform into whipped cream requires some refrigeration time. First, choose a brand of unsweetened full-fat coconut milk with minimal ingredients. The night before you plan on making your coconut whipped cream, place your can of coconut milk in the refrigerator. While you may be tempted to try your freezer as a quick alternate cooling method, freezing coconut milk for whipped cream is not recommended.
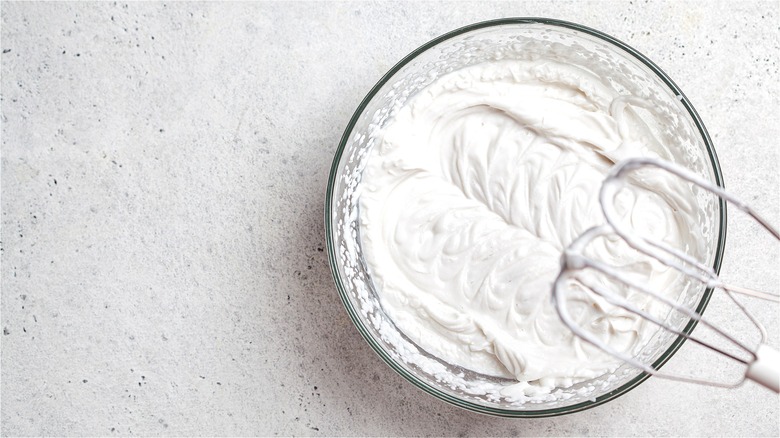
When you're ready to make your coconut cream, make sure to gently open your can of coconut milk to avoid shaking or mixing the firm top coconut layer, which by that point, will have likely separated from the added water. If what you're after is thick whipped cream similar to the dairy version you know and love, scoop out only the solid white portion at the top of the can. As with traditional vanilla whipped cream, add your preferred amount of powdered sugar and vanilla and mix with a high-speed mixer until light and fluffy. Unlike dairy whipped cream which can take up to 4 minutes to whip, coconut whipped cream may take longer to mix until you reach the desired consistency. Now that you know the simplicity behind this alternative whipped cream, there are some extra tips worth keeping in mind to achieve delightfully fluffy results.
How to create fool-proof coconut whipped cream every single time

While you might already be thinking that coconut whipped cream doesn't vary from the dairy-filled original in terms of preparation, there are a few unique steps worth following when making this plant-based alternative. Although using cold coconut milk is essential, chilling your bowl and beater attachments 30 minutes to an hour before you whip your cream will help ensure the mixture holds its shape. When adding sweeteners, try and avoid using liquid-based ingredients like honey or maple syrup which can impact the resulting texture of your whipped cream.
Since the goal is to create an equally airy yet full-bodied whipped topping, if you find the mixture too thick upon whipping, use a portion of the reserved coconut water from your can of coconut milk. For your resulting coconut whipped cream to hold its shape upon your favorite baked goods, aim to chill the mixture for a handful of hours before using. If you plan on using this plant-based substitute as a convenient frosting for your next round of pumpkin gingerbread cupcakes, chilled coconut whipped cream works best. As long as you follow these helpful suggestions, you're sure to see many luscious bowls of coconut whipped cream in your future.