How To Make Amy's Bread Slideshow
It's important to have everything ready to go — the flour, water, yeast, salt, and starter — before you begin. Scherber says that it's very important to use a scale to measure ingredients because it will weigh the same on any day, whether or not it's humid. (A measuring cup, for instance, would be inaccurate.) As a professional, it's very important to be consistent in your products and a scale is one way of ensuring that. —Yasmin Fahr
Step 2: Amy Mixing with Her Hands
"Don't be afraid to get your hands on the dough, that's the fun part," says Scherber. You also want to make sure the water is at the right temperature so you don't deactivate your yeast. The starter, she says, is really the secret to flavor. It already has 18 hours of flavor going into the dough, which adds more complexity to the flavor. —Y.F.
Step 3: The Shaggy Mass
It's called a 'shaggy mass' at this level and looks like thick batter. Scherber says that you want the dough to feel wet, so if it doesn't feel that way, then add more water. "People usually say to add more flour," she says, "but we say the opposite. You want it to be sticky and supple, so if you're adding more water, add 1 tablespoon at a time." —Y.F.
Step 4: Kneading the Dough
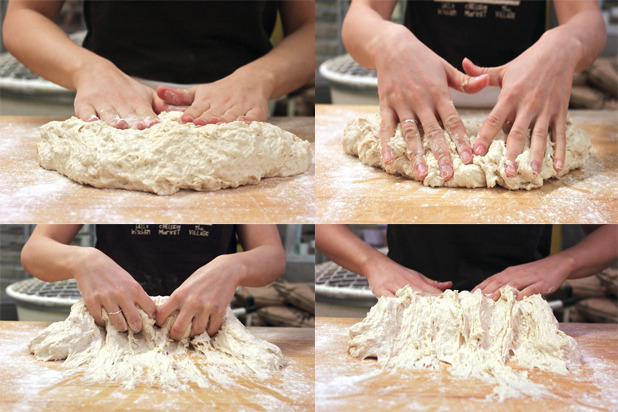
As Scherber explains, if you want chewy structure, then you need to knead (as opposed to no-knead bread) because at the beginning of the kneading process, you are developing the gluten structure (the protein that gives bread its elasticity and ability to rise). When kneading, you begin with more of a pool of dough than a ball and you can really feel the elasticity and structure developing as you knead. It gets stronger and is not sticking to the table as much. Then let it rest and develop on its own as the proteins set to work. She notes that this is really fun to do with kids but it can get messy. And she speaks from experience. She once hosted her son's class at her Chelsea Market store and taught them a little about the bread-making process.
When kneading, Scherber says to use your full hand to push the dough away, then stretch up and pull back toward you like what's being done in the photograph. —Y.F.
Step 5: The Risen Dough
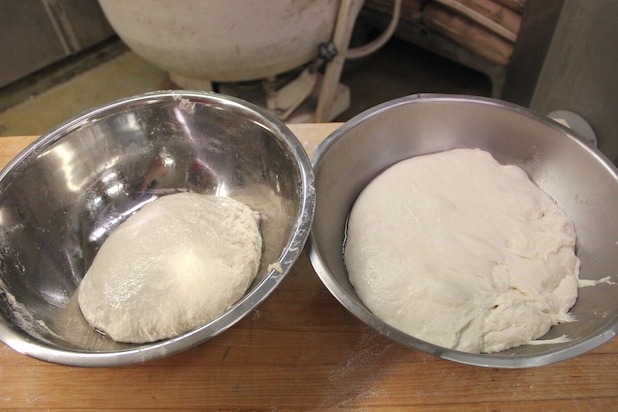
After letting the dough rest, kneading it again for six-eight minutes, letting it rise for an hour, and then again for another 45-50 minutes, it will have doubled in size. This picture compares the dough after the second kneading process with dough that has doubled in size after its second rest. At this point the dough is strong and supple and ready to be shaped. —Y.F.
Step 6: Shaping the Dough
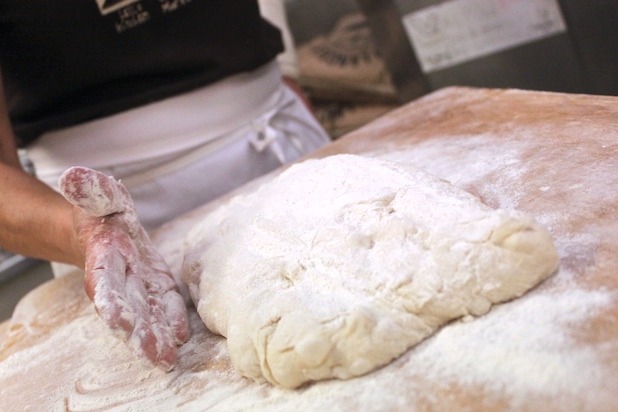
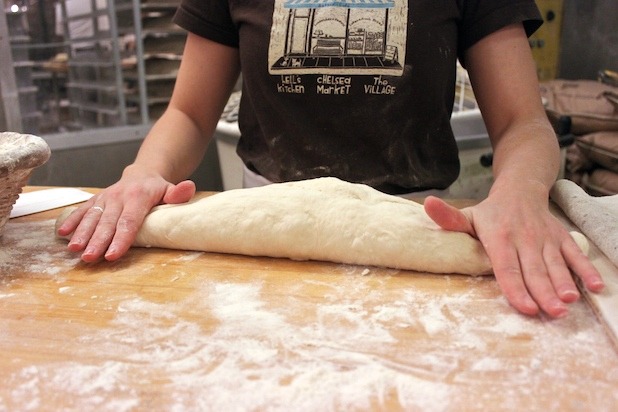
Let the dough fall gently on the lightly floured table so you don't deflate it, and shape it into a big rectangular pillow says Scherber. She recommends trying to keep it straight as you bring it out of the bowl because you want it to be soft and flat. Then, using a dough scraper, cut the rectangle in half. Now, you get to choose whether you want to make a ciabatta or batard. Keep clicking to see how both are done. (Or, you can always opt to cut the dough into strips for bread sticks or add seeds on one side). —Y.F.
Step 7: Ciabatta
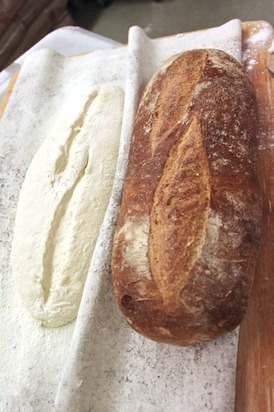
Add flour to the board where you're going to let it rise and sprinkle a little flour on top of the dough. Hold the top, smaller edge with each hand and gently flip it onto the board. Add a little more flour, let it rise, and flip it again to bake it. The flour on what is eventually the top is what gives you the nice cracked patterns and striations. —Y.F.
Step 8: Shaping the Batard
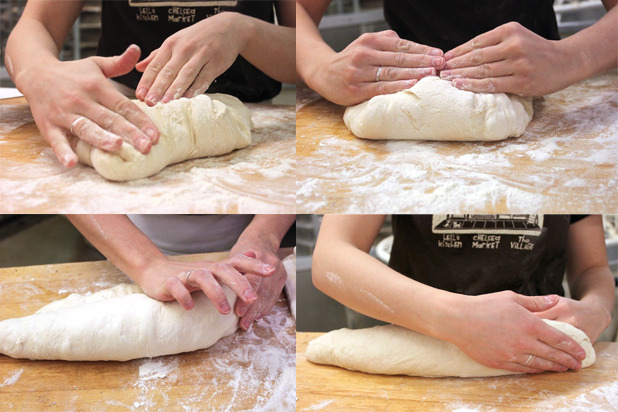
As illustrated here and described by Scherber, pull two of the corners in to form a triangle and then pull the triangle tip toward the center of the dough, folding it over, to create a crescent shape. Gently seal the edge using the heel of your hand, moving along both ends. —Y.F.
Step 9: Shaping the Batard, Continued…
Like the photo, Scherber says to roll the corners back and forth with your hands, but don't make it too flat. Sprinkle some flour on it to make it look more rustic when it's baked. —Y.F.
Step 10: Scoring the Batard
Using a Lame Slashing Tool or sharp razor, says Scherber, make two cuts, each starting at one tip and going halfway to the center of the bread, about one inch apart from each other. This allows oxygen to escape from the bread and makes a signature look on it. If you don't do it, it will burst somewhere, so now you're telling it where to crack so it looks prettier. The ciabatta, though, cracks on itself and all the holes are there. —Y.F.


