11 Ways Olive Oil Comes In Handy When Cleaning Your Kitchen
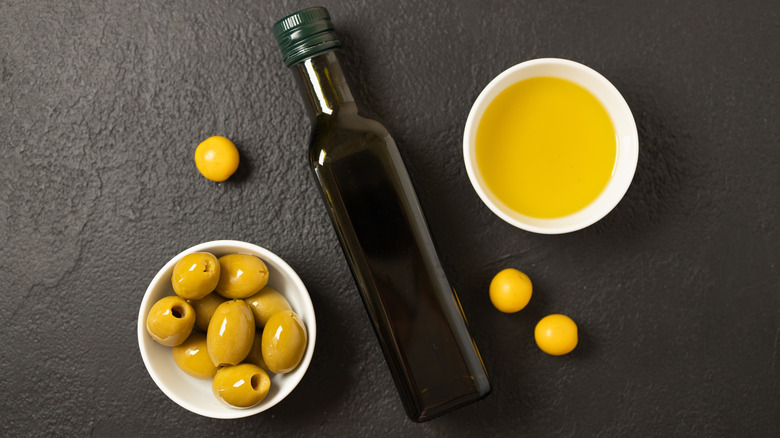
It's no secret that Americans love olive oil, and hence, over the past few decades, its use in the United States has increased drastically. Most people know and love that olive oil is both healthy and also fairly versatile since it is great for stir-frying, making salad dressings, and so much more. However, besides cooking, there are plenty of uses for olive oil that are highly underrated, with one of them being that olive oil can come in handy when cleaning your kitchen without making things greasy.
I've been cooking at home for almost two decades now and have also worked at a professional kitchen for five years. During this time, I have learned that basic ingredients like olive oil can really help to effectively clean certain areas of a kitchen. Moreover, it can be particularly useful when you're in a pinch and don't have any other cleaning supplies on hand, or when you're on a budget and don't want to buy any expensive cleaning products. From polishing brass and copper equipment to removing sticky residue, the ways olive oil can help while cleaning your kitchen will surely leave you pleasantly surprised.
1. Cleaning stainless steel
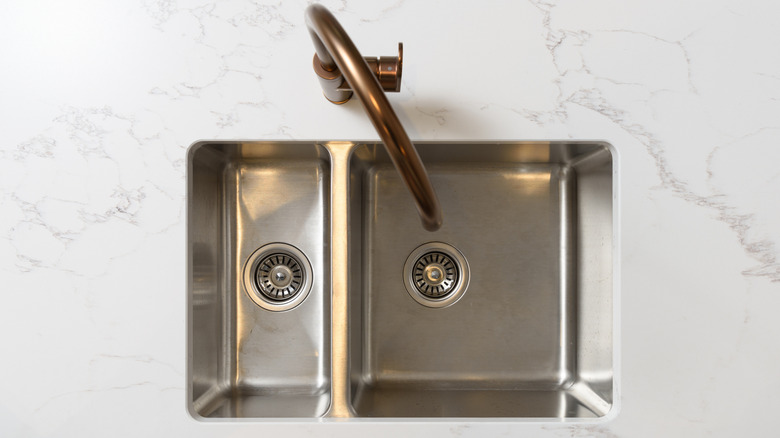
Stainless steel countertops and sinks are highly prone to getting grease marks and water stains, which can sometimes be very difficult to get rid of, despite how hard you try. A simple and effective way to get rid of them and also make your stainless steel surfaces shine is by using some olive oil and a cleaning cloth.
While cleaning these surfaces with olive oil, you should first remember that a little goes a long way, and too much oil can attract dust. Therefore, adding a small amount of olive oil to a cleaning cloth and rubbing the surface of your sink or countertops is good enough to get rid of streaks and watermarks. This method is also a great way to make stainless steel silverware shine, since it can also prevent watermarks. However, it is also essential to remember that while olive oil will help remove light watermarks, grease marks, and smudges, if there's a heavy dirt build-up on any stainless steel surface, you will have to use a basic cleaner first.
For that, too, you can go for a natural, homemade cleaner made with baking soda and vinegar, which is a highly popular way to clean stainless steel sinks. Once you're done cleaning with the baking soda and vinegar solution, you can wipe the surface of your sink and countertop down with a cloth that's lightly coated with some olive oil to prevent further smudges and streaks.
2. Polishing wooden cabinets
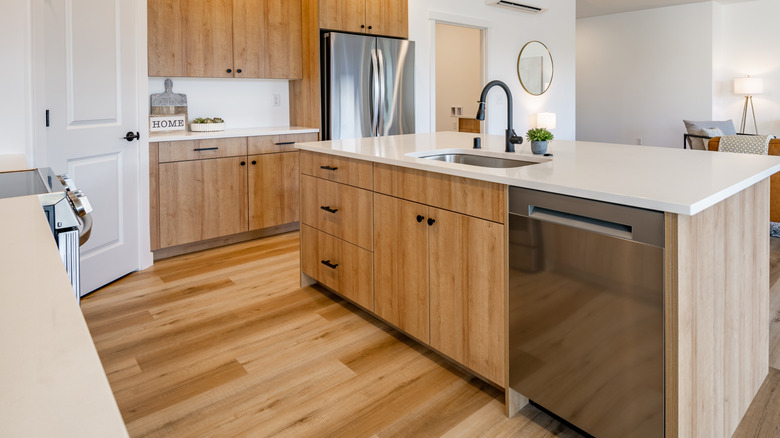
Wooden cabinets and drawers in kitchens often need to be polished to maintain their quality and improve their finish, and a quick and simple way to get them to shine is by rubbing them with some olive oil. Olive oil can help nourish the wood and bring out its natural shine. Plus, since it is likely already stocked in your kitchen, olive oil is also a lot cheaper to use than wood polish. But, it is crucial to remember that too much olive can also ruin the finish of the wood, so it is best to start with a small amount and rub it into the wood with a cloth. You can gradually increase the quantity, but only if needed. A thin layer will also help protect your cabinets and drawers from water, without attracting too much dust.
What's more, folks may assume that olive oil can also help revive wooden cutting boards, but you really should reconsider. Although using olive oil on wooden cabinets can work, it is one of the oils that should never be used on a wooden cutting board. This is because a wooden cutting board may have plenty of cuts and cracks, and olive oil can seep into those and turn rancid. This can be a major hazard as, at some point, food will come in contact with the same cutting board and the rancid oil can contaminate it. So, it is best to use mineral oils instead for wooden cutting boards.
3. Removing sticker residue

If you love reusing plastic and glass jars or bottles from grocery stores, this one's for you. Reusing those jars and bottles is a great way to be cost-effective and environmentally conscious, but, before reusing them, many of us want to make them sparkly clean. Although peeling the sticker off isn't much of a task, removing the remaining residue can be a whole ordeal. Here's an easy way to get rid of all that sticky residue: just use olive oil! Olive oil, because of its greasy texture, will help get rid of all that residue and also make your jar or bottle shine, making it look as good as new.
Using olive oil to remove the residue is as simple as it can be, as all you have to do is rub some of it on the sticky surface with your fingers, and let it sit for about five minutes. After that, if the surface of the jar or the bottle still seems sticky, you could let it sit for a little longer to help loosen the sticky bits further. If needed, you can rub some more olive oil on the surface, but try not to overdo it, as that may lead to a greasy mess. Once you've given the sticky bits enough time to loosen, rub the surface of the jar or bottle with a cloth, preferably a microfiber one, as it will reduce the chances of lint sticking to the surface and give your jar or bottle a streak-free finish.
4. Preserving cast iron skillets
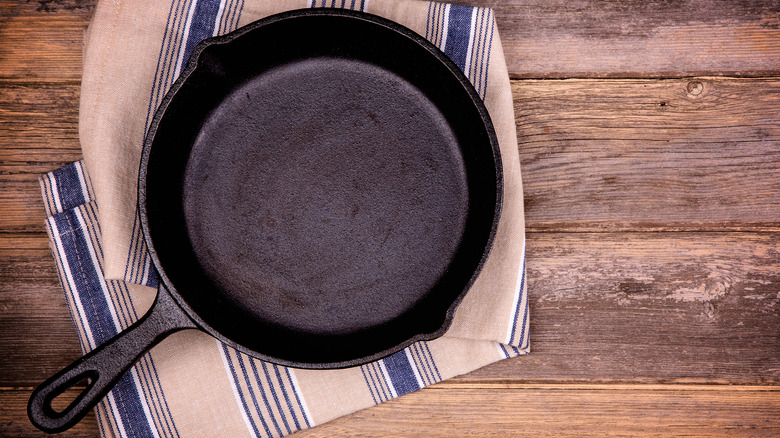
Using olive oil to season cast iron skillets is a great way to preserve them. But, before getting to how you can actually do it, let's first discuss what it means to season a cast iron skillet. Seasoning is basically the non-stick surface coating on a cast iron skillet. Most cast iron skillets today already have a non-stick coating. However, over time, and with constant use, the natural seasoning can wear off and cause problems like food sticking to the surface, rusting, and difficulty cleaning the skillet. So, once you notice the natural seasoning of the cast-iron skillet wearing off, it is important to re-season it, which can easily be done with olive oil.
To season and preserve your cast iron skillet with olive oil, you'll first have to apply an extremely thin layer (the skillet should feel dry to the touch) on the surface, as too much of it can create hot spots while in the oven. Also note that a step that most people forget while seasoning their cast iron skillets is not rubbing the outer surface with olive oil too, which can also erode over time. Once you've coated the skillet thoroughly, place it upside down on a rack in your oven, at 350 degrees Fahrenheit for about an hour. Once the timer goes off, let the skillet cool down before reusing it. You can repeat this process every time you notice the seasoning wearing off, allowing you to enjoy your skillet for a lot longer.
5. Preventing stains in plastic containers
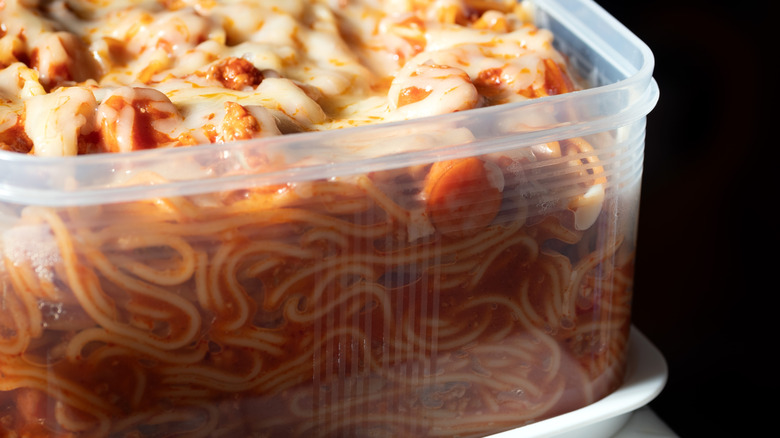
Sauces with a strong acidic base, like a simple marinara, are very likely to stain the insides of your plastic containers, and removing them can be challenging. Luckily, all it takes is a light coating of olive oil in the container to prevent those tough stains. So, before storing a sauce with an acidic base in a plastic container, just apply a thin layer of olive oil on the inside. Make sure not to use too much, as that can turn the surface overly greasy, and eventually, some of the excess oil may also mix in with your sauce and ruin its flavor.
There are a few more things you can keep in mind to reduce the chances of staining even further. Firstly, always let your sauce cool down before storing it in the plastic container, as a hot, acid-based sauce is more likely to stain the surface. Moreover, a sauce that's hot may also cause some of the olive oil coating to melt and mix in with it. Next, try not to reheat your sauce in the same container, even if it is completely microwave-safe, as that too may also cause the oily coating to mix in with the sauce and result in tougher stains that are hard to get rid of. Lastly, you can use this method to prevent stains in plastic containers while storing any type of food other than spices, as the oil can turn them rancid.
6. Polishing brass and copper
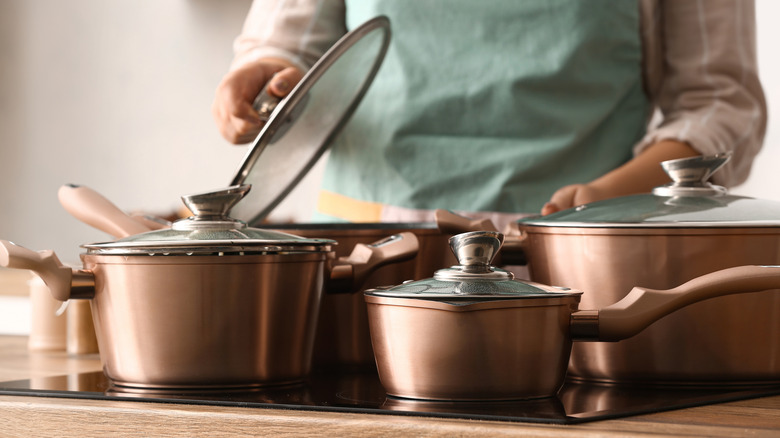
Brass and copper are often used to make cookware and they are both highly prone to oxidation, which can result in them eventually losing their shine. Using olive oil is a highly underrated way to polish brass and copper equipment to restore their original look. Additionally, olive oil will also reduce further chances of oxidation by creating a protective layer.
To polish brass or copper, whether it's a piece of equipment or a sink, you'll first have to clean the surface as thoroughly as possible, if it isn't already. In this case, if you want to steer clear of store-bought cleaners and prefer to use something natural, you can easily make a cleaning solution at home with a few pantry staples. All you need to do is combine equal parts of vinegar and flour and then add half as much salt to the mixture. Apply this homemade cleaning agent onto your brass and copper equipment or sink, and let it sit for an hour or two before rinsing it off with some water. Alternatively, you can also use a solution made with equal parts of distilled white vinegar and water to get rid of the tarnish; however, you'll have to let your equipment soak in it overnight for the best results. Once that's done, you can wipe the surface with a clean cloth that's lightly coated with some olive oil for a shiny finish and to prevent further tarnishing.
7. Fixing and cleaning squeaky door hinges
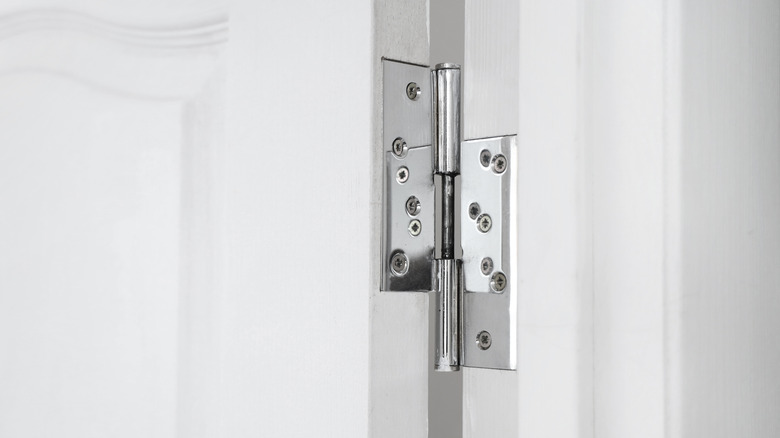
There's likely a door in your kitchen with squeaky hinges that's been bothering you for quite some time. If you don't have the time to get specialized lubricating oil to fix those squeaky door hinges, olive oil can be a great quick fix. Similar to any specialized oil, olive oil, too, will help lubricate those hinges and prevent further squeaking.
However, while olive oil works well, it is important to use as minimal an amount as possible to prevent the oil from turning rancid over time (it is a cooking oil after all). The best way to drop small amounts of olive oil onto the hinges is with a dropper. Alternatively, you could add some olive oil to a cleaning cloth and rub it lightly on the hinges, which is also a great way to get rid of light dirt buildup. If there's a lot of grease and grime stuck onto the door hinges, it would be ideal to first clean them with cleaning solutions and water, then move on to oil. Or, if the hinges continue to squeak even after you've rubbed olive oil on them, you can carefully take the pin out of the hinge, wipe it with a cloth that's lightly coated with olive oil, and place it back into the hinge. That should effectively stop the squeaking and also lubricate those hinges enough to prevent rusting.
8. Preventing rust on knives
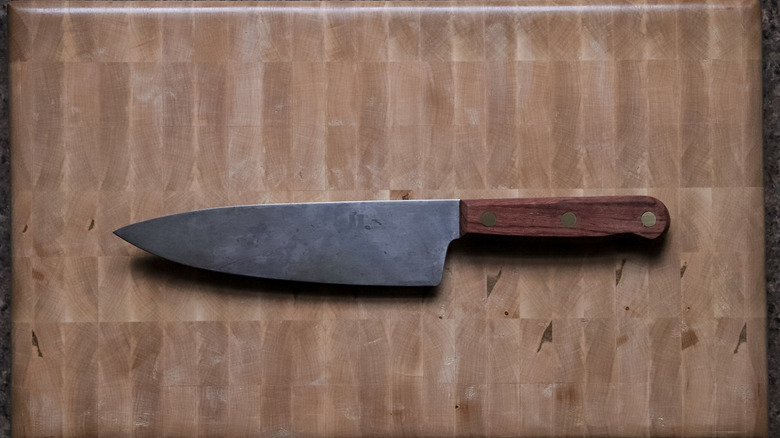
Rusty knives are not just difficult to work with, but they can also pose a health hazard. To prevent your knives from rusting, investing in a food-grade mineral oil is the best option. Olive oil will do in a pinch, but it may turn rancid over time, so it is not recommended as a long-term solution. That said, olive oil largely works the same way a mineral oil does to help prevent oxidation. The fact that knives can oxidize may come as a shock considering that most knives used by home cooks are made with stainless steel, which, well, doesn't rust. However, many cooking enthusiasts prefer using carbon steel knives instead. And, although these knives are a lot sharper than regular stainless steel knives, they are more likely to rust due to the carbon content.
So, applying a thin layer of olive oil on the blade is a great way to protect these knives. But, before applying olive oil onto the blade, you first need to ensure that your knife is thoroughly clean, and for that, you can use a solution of dish soap and water, as usual. Once the knife is clean, you can carefully rub a minimal amount of olive oil onto the blade, ensuring it doesn't feel too greasy. Also, don't place the clean knife back into a knife block, as the block may be full of dirt and can effectively ruin the olive oil coating. Instead, you can try storing your olive oil-coated knives safely inside a leather knife roll, if you have one, or even a blade guard will work just fine.
9. Cleaning glass stovetops
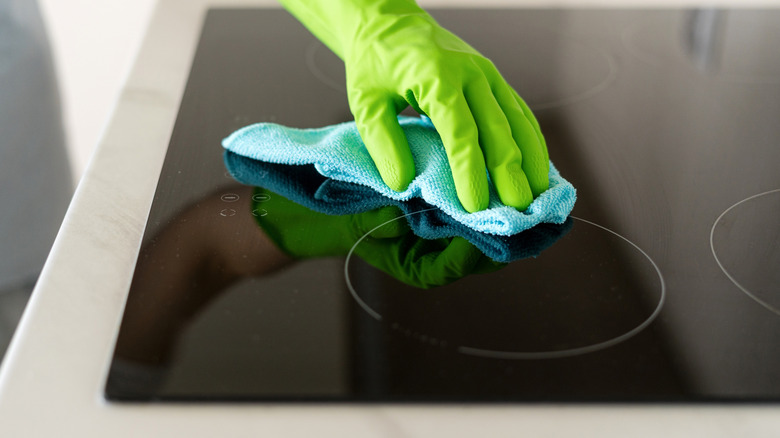
If you have a glass stovetop in your kitchen that has bits of burnt food stuck to its surface and are looking for a quick way to get rid of all that, you can very well rely on olive oil. Applying some olive oil on the burnt bits and letting it sit for a while will help loosen them, and after that, they can easily be wiped off with a microfiber cloth.
Here, it is crucial to remember that if there's an excess amount of dirt buildup on your glass stovetop along with those burnt bits, it is better to first clean the stovetop thoroughly, then move on to applying olive oil. A common mistake to avoid when cleaning a glass stovetop is using special chemical-based cleaners. Sure, they do the job, but some of the chemical residues can remain on the surface, and when you switch the stove on, they can release toxic fumes. So, instead, use water and a small amount of dish soap to get rid of the dirt buildup. Once that's done, you can remove the remaining burnt bits with olive oil and a cloth. What's more, once you're done cleaning the burnt food residue, you can also apply a thin layer of olive onto the surface of the stove, around the burners, to prevent water marks and streaks.
10. Conditioning Leather
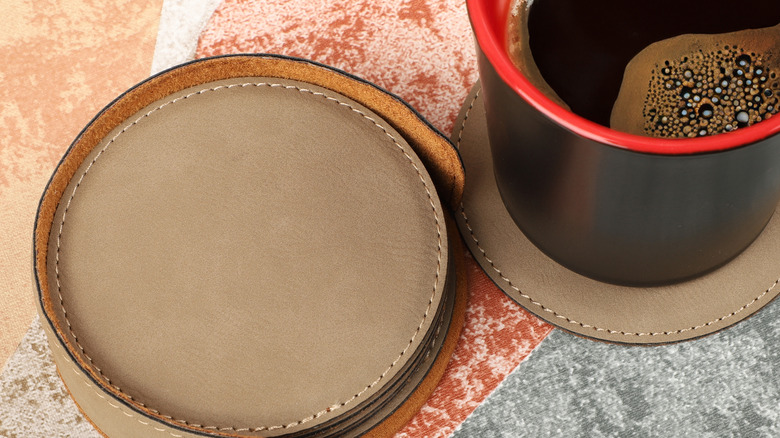
Leather can be found in a kitchen in the form of coasters, knife organizers, or even fancy pan holders. All of these are very prone to getting cracks on their surface, increasing the chances of their quality degrading faster than any of us would like. To condition all the leather items in your kitchen and reduce the chances of the surface cracking further, ditch the fancy conditioners and, instead, make a DIY conditioner at home using olive oil, shea butter, and beeswax. To make this fantastic homemade leather conditioner, all you have to do is heat equal quantities of all three things together and mix them well.
Once the conditioner has cooled down, rub small amounts of it onto your leather goods, and then buff the leather with a dry cloth to remove the excess mixture. This simple process will prevent further cracks in your leather coasters, pan holders, or knife organizers, while reviving their natural shine. Here, it is also crucial to know that while olive oil works well for conditioning leather when mixed with shea butter and beeswax, using olive oil alone to condition leather isn't the best idea, even if you are in a pinch. In fact, some leather artisans don't recommend applying olive oil directly on leather, as it can stain it and ruin its natural shine. So, it's best to use the DIY conditioner if you don't want to invest in fancy leather conditioners or don't have any other options available, but never use large amounts of olive oil on its own.
11. Removing pet hair
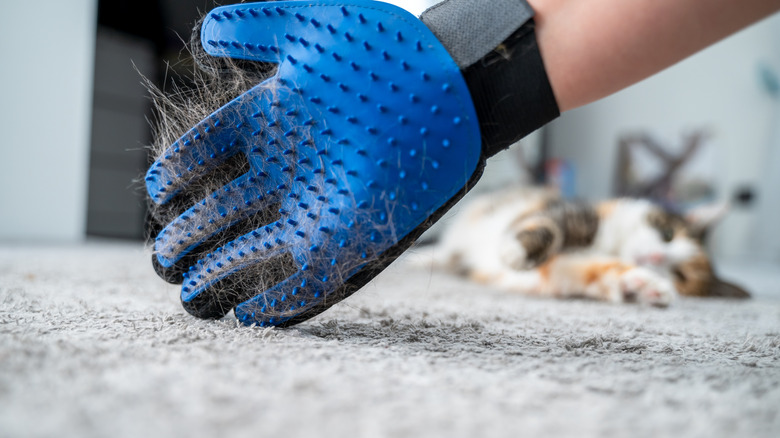
Anyone who has a pet would know how frustrating it is to see fur literally everywhere in the house, including the kitchen. While there might not be much that you can do to instantly stop your pet from shedding, you can use olive oil as a quick fix to get rid of all that hair from your kitchen counters. This method to remove pet hair isn't very conventional, but it will still leave your kitchen clean and fur free.
To collect all that pet hair stuck on your kitchen counter, cabinets, or drawers, you can lightly coat a cleaning cloth, preferably microfiber, with some olive oil and then rub the cloth on the surface in a single direction. This should effectively and efficiently make all the hair stick to the cloth, making it a lot easier to collect. In case there are still a few strands of hair stuck to the surface, you can repeat the process until you get all of them, and then rub with a clean cloth to get rid of any leftover grease from the oil. In addition to collecting all the hair, the thin layer of olive oil will also help make your wooden cabinets and stainless steel countertops shine. Just make sure not to use too much olive oil, as that can leave the surface excessively greasy. However, note that while this method almost works the same way as adhesive lint rollers do, it isn't effective on porous countertops made with certain types of stones.