How To Roll The Perfect Burrito
The art of burrito rolling is one taken for granted. Most of us either heat up a burrito from the frozen aisle at the grocery store, or just order one at our favorite Mexican, Tex-Mex, or southwestern restaurant. Those from the latter arrive perfectly tight, rounded, and ready to chomp on. But, have you ever tried to roll your own burrito? It looks easy to do, no? Yet sometimes the results can be loose and sloppy, making for a rather messy meal. Luckily, I learned how to do it properly from two experts from Moe's Southwestern Grill, right at its HQ test kitchen in its hometown, Atlanta, Georgia. By the way, Moe's isn't named after someone, but is actually an acronym for "musicians, entertainers, and outlaws."
With the careful words, hands, and guidance of Moe's Executive Chef Matt McKinney, and Menu Innovation Manager Dominic Belli, we really got things rolling. Prior to his current position, McKinney was a trainer and would travel to new Moe's Restaurants where he'd train 30 to 35 employees at a time on how to roll burritos. His opening remarks in the lesson were both encouraging and hilarious: "No matter how bad yours is, I've probably seen worse." After several tries, I became somewhat of an expert myself. Now I'm ready to impart this industry knowledge to the world at large. Remember, practice makes (a perfect) burrito. If you don't want to practice with your final ingredients, you can always start with just a bed of lettuce and rice.
Step 1: Assemble and center your ingredients on the tortilla
Whether you're working the food line behind the counter or prepping in your own kitchen counter, the key is to assemble all the proper ingredients. First and foremost, a perfect burrito starts with a quality tortilla. The folks over at Moe's utilize many suppliers for its 12-inch tortillas, but it most commonly leans on Olè's La Banderita brand. Tortillas can be stored at room temperature before use, and it's best to warm them up before getting things rolling. Home options include microwaving them between paper towels or heating them in a hot pan for a few seconds per side. If you need to quickly warm up a whole bunch at once, check out this hack for stacking them.
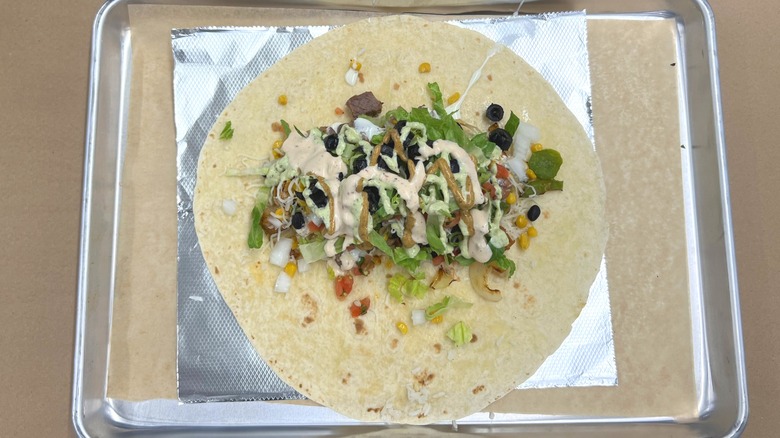
Next, lay the tortilla flat, preferably on a foil sheet. How you fill it out from here is up to you, as there are plenty of awesome burritos recipes out there. Starting with your base — rice, beans, and proteins — lay them right down in the middle of the tortilla. Add all your additional accoutrement of cold toppings, followed by salsas, and sauces. The team at Moe's recommends that lettuce should be the last item added in the burrito to help keep more fluid toppings like sour cream and guacamole inside, and in place. It's important to keep these mounds of ingredients centered, with an equidistant amount of space on each side for the top and bottom of the tortilla flaps to be folded later.
Step 2: Fold the tortilla down
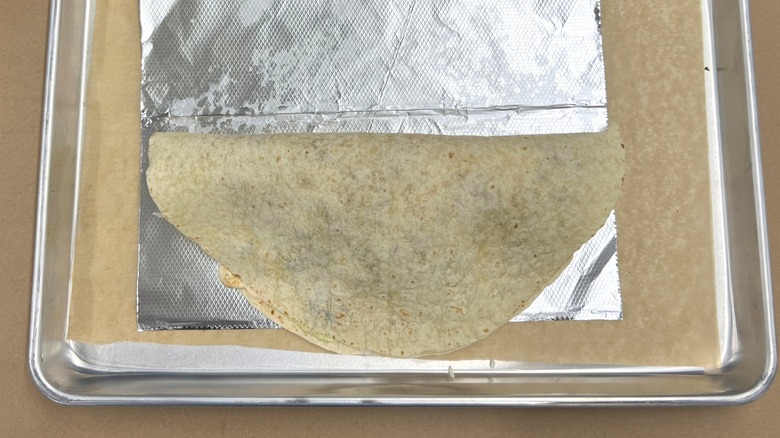
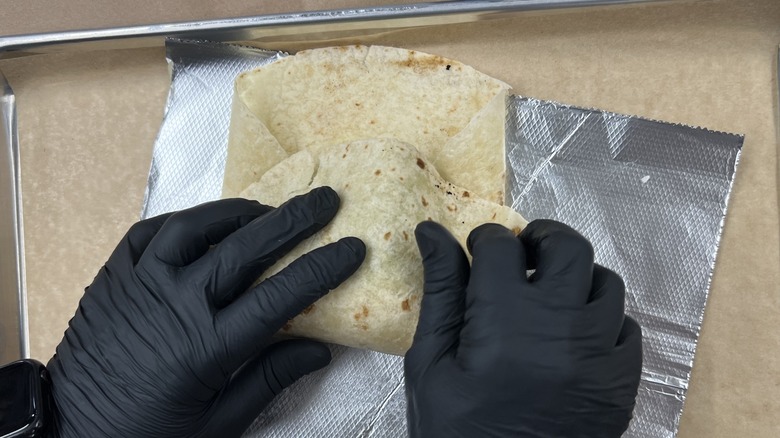
The burrito currently sits open-faced with the ingredients square in the middle of the tortilla. The next step is to form a "wall." Chef McKinney said, "First thing you want to do is take the top of your burrito and you want to fold it down. Not all the way, about ¾ of the way down, and push it down so you have a nice wall."
As you bring down the top of the tortilla to the bottom, the key is to keep those ingredients in place. This will prevent them from slipping off to the side or landing further up in the fold of the tortilla. When the top and the bottom of the tortilla meet, the ingredients form a sort of mounded belly.
Step 3: Fold the tortilla's side wings
With the first fold move complete, it's time to unfold it. You'll see the ingredients are more flattened and aligned towards the bottom of the tortilla.
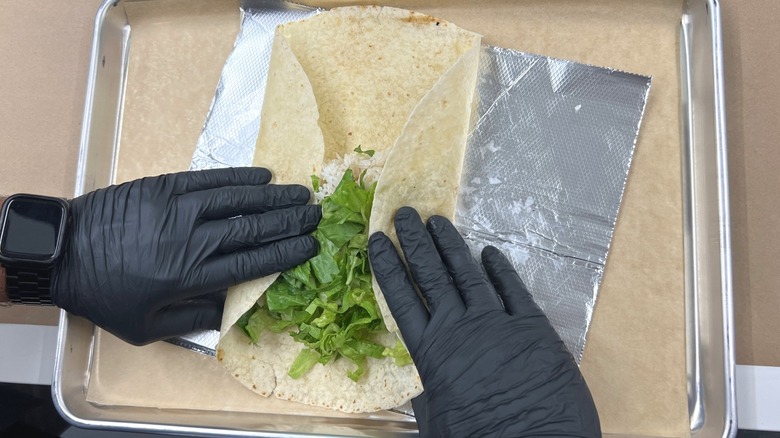
Chef McKinney described the next step: "Take the sides, and you're going to fold it in, until they kiss, and then push down and spread it out a little bit." The sides are the left and right "wings" of the tortilla, which were untouched in the previous step. As you fold inwards, be sure to gently press down on the ingredients, so they can be mildly flattened in the middle. After the two wings "kiss" to create tightness, open them up a bit, but be sure to keep their width and length parallel to one another. The space between them should end up being about 2 to 3 fingers wide.
Step 4: Roll it up
With the wings now folded in, the ingredients are more aligned from a center-down position within the tortilla. You will now notice more empty space at the top of the tortilla.
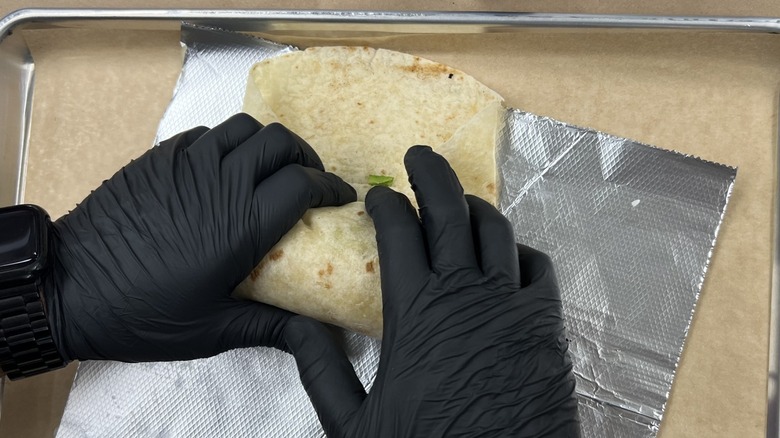
This penultimate rolling step will begin from the heavy-bottom side, working our way to that more empty top flap of the tortilla. The paramount thing to remember here is to continually squeeze and roll. Menu Innovation Manager Dominic Belli explained in more detail: "When you're rolling it, kind of add some pressure to it. And then you're going to grab both ends, really tight, and just squeeze, and then you twist the ends up, and you can fold them underneath." This is probably the most important step so no need to race to the finish. Gradually squeeze and roll as the bottom makes its way to the top. Use your fingers to keep tucking the rounded mound in as you roll it up. The tighter the better.
Step 5: Wrap it up

The final step is to give your burrito a final wrap with foil. The foil adds an extra level of tightness to keep your burrito whole and in place. It also helps to keep the contents warm for eating shortly thereafter, or for storing in a fridge.
For this step, grab a foil sheet and lay it down flat. Take your already tightened burrito and place it directly in the middle of the foil with the flap side down. Utilize the same squeeze and roll technique form the previous step to keep the burrito tight in the roll-up. There will be excess foil on the side that looks like thin handlebars. The final step is to twist them each, and then fold them into the side of the bulky part of the foil. If you like your burrito cut in two, use a serrated knife and slice directly through the foil.
Now that you've created the perfect burrito, let's say you're not exactly ready to eat it just yet. The team at Moe's recommends two methods for reheating: You can either heat it up in a pan, or in the microwave. For the former, keep the foil wrapped around the burrito, and turn frequently until it reaches 165 degrees F. For the latter method, remove the foil to avoid ruining your microwave. Instead, wrap it in a paper towel and microwave it anywhere from 30 to 60 seconds, depending on your unit. ¡Buen provecho!