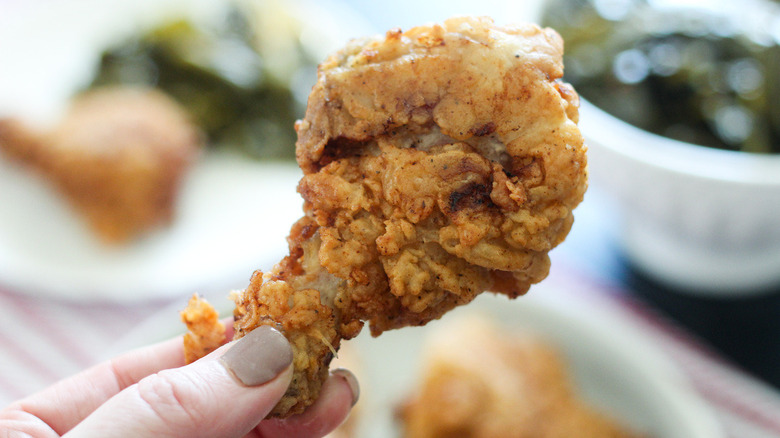
Cast Iron Fried Chicken Recipe
Believe it or not, you don't need a deep-fryer to make juicy-on-the-inside, crispy-on-the-outside fried chicken. Instead, you can follow this cast iron fried chicken recipe, courtesy of developer Erin Johnson. As the name suggests, you'll fry the chicken in a cast-iron skillet, which is a great method for home cooks. The cast iron will help keep the oil at an even temperature — something that regular pots and pans don't do so well — which will in turn leave you with perfectly cooked, crispy chicken.
And, if you're anything like Johnson, this recipe will bring up some nostalgia, too. "Fried chicken is one of the foods that takes me back to Sunday suppers of my childhood, and I love passing that tradition on," she says. If you are from the South or are at all interested in regional cooking, then there's a good chance you want to find a go-to recipe for the classic Southern fare. Well, look no further: This cast-iron fried chicken recipe gets the job done well, and no fancy kitchen gadgets are required.
Gather the ingredients for cast iron fried chicken
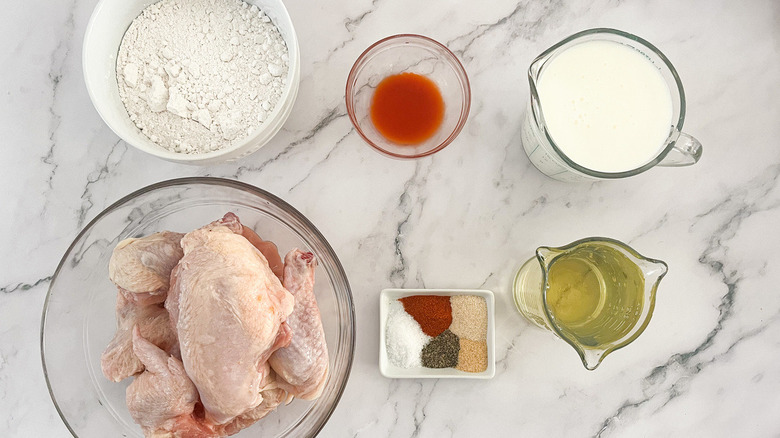
Another great thing about fried chicken is that, though it's a great way to elevate plain old chicken, you don't really need too many ingredients to make it. In fact, for this recipe, all you need is the chicken itself (broken up into pieces), buttermilk, hot sauce, flour, salt, pepper, onion powder, garlic powder, paprika, and either vegetable or peanut oil for frying. "If you have chicken pieces you prefer, feel free to substitute whichever you'd like," Johnson says. "This even will work with boneless, skinless chicken and makes amazing chicken tenders."
Marinate the chicken

If you want moist and flavorful chicken, a buttermilk marinade is key — and, luckily, you'll only have to marinate the chicken for as little as 15 minutes. That said, Johnson does note, "The longer you marinate your chicken, the more tender it will be." Into a large bowl, add in the chicken pieces, buttermilk, hot sauce, and 1 teaspoon each of salt and pepper. Stir to evenly coat the chicken, then cover the bowl and place it in the fridge for at least 15 minutes.
"The amount of hot sauce in the buttermilk doesn't add a significant amount of heat, but does help to give the chicken some added flavor," Johnson explains. "If you want spicy, add more and consider adding cayenne to the flour mixture," she adds, referring to the coating that you'll make in the next step.
Season the flour and dredge the chicken
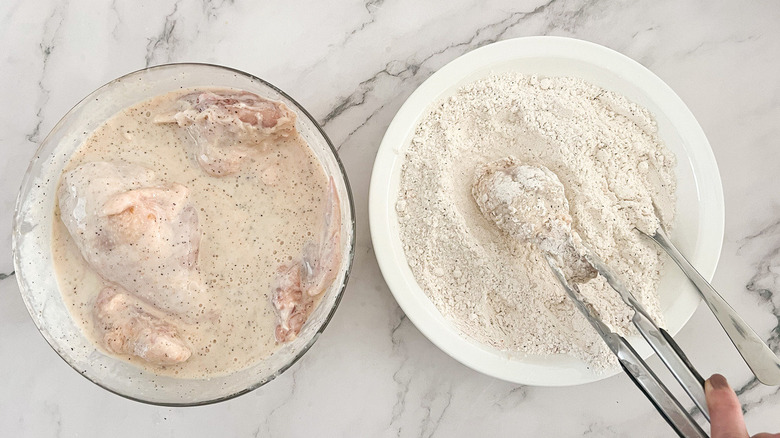
Pour either vegetable or peanut oil into a large cast iron skillet and get it preheating to 350 F. Meanwhile, add the onion powder, garlic powder, paprika, 1 teaspoon of salt, and 1 teaspoon of pepper to the flour. Mix it all up, then grab the marinating chicken from the fridge. Dredge each piece of chicken in the flour; to do so, simply remove a piece from the marinade, let any excess liquid drip off, then transfer the chicken to the bowl of flour. Be sure to coat it evenly, then set aside and repeat the process with each piece of chicken.
Fry the chicken
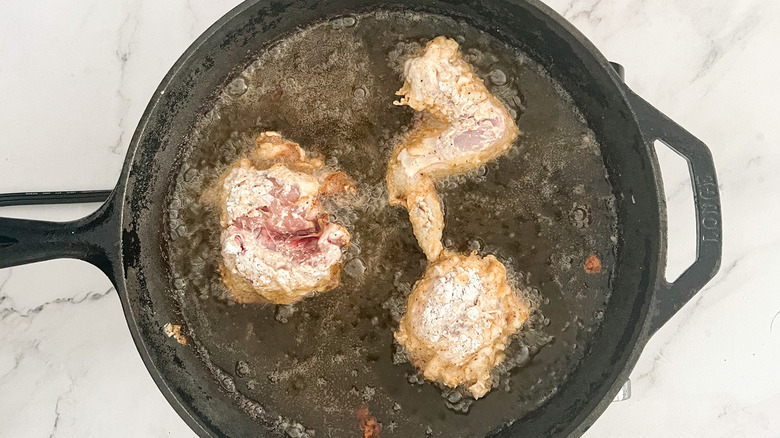
With each piece of chicken all coated and dredged, and the oil at 350 F, you're ready to fry. Before you do, Johnson does have one word of optional advice: "I cut the breasts in half before frying to make them more evenly sized with the thighs and to keep a similar cooking time but this is personal preference."
Add a few pieces of chicken to the cast iron, but be sure not to overcrowd the pan. You may have to work in batches. Allow the chicken to cook on one side, letting it get nice and golden brown. Then flip, allowing the chicken to turn golden brown on the other side, which should take another 15 minutes or so. To play it safe, use a thermometer to check the temperature of the chicken, which should reach 165 F.
Once each piece of chicken is done frying, place them on a rack-lined baking sheet. If not serving right away, keep the chicken warm in the oven until you do serve.
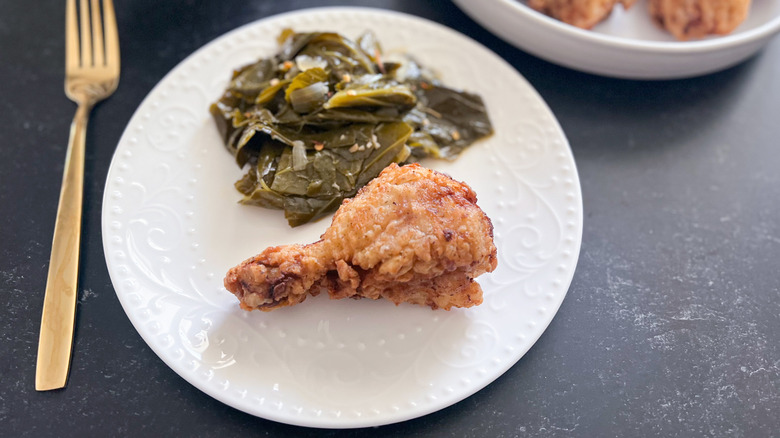
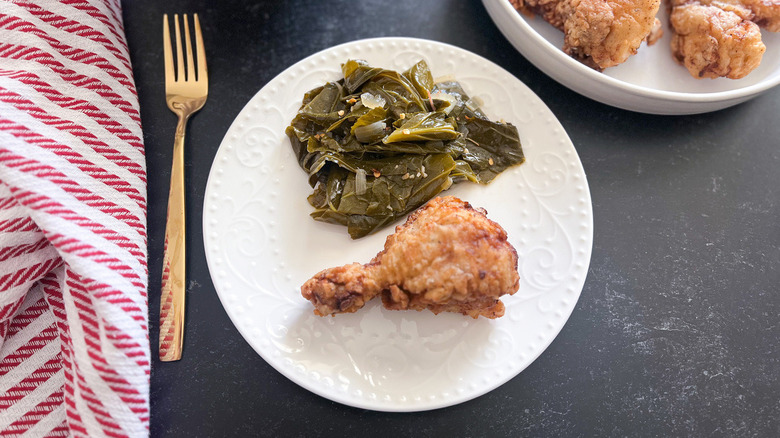
Serve and enjoy this cast iron fried chicken
When it comes to serving the fried chicken, you can't go wrong with classic sides like mashed potatoes, collard greens, or macaroni and cheese. Throw in some coleslaw for good measure, and you've got a Southern feast on your hands.
Any good feast has to come to an end, and there's a chance you'll have some leftover chicken in the aftermath. "The chicken will keep in the fridge for up to 3 days," Johnson notes.
- 1 chicken, in pieces
- 2 cups buttermilk
- 1 tablespoon hot sauce
- 2 teaspoons salt, divided
- 2 teaspoons pepper, divided
- 2 cups flour
- 1 teaspoon onion powder
- 1 teaspoon garlic powder
- 1 teaspoon paprika
- 2 cups vegetable or peanut oil for frying
- In a large bowl, combine the chicken, buttermilk, hot sauce, and 1 teaspoon of salt and pepper. Stir to coat the chicken. Cover and refrigerate for at least 15 minutes.
- Mix together the flour, onion powder, garlic powder, paprika, and the remaining salt and pepper. Stir to mix the seasonings evenly throughout.
- Pour oil into a cast iron skillet and heat to 350 F.
- Dredge the chicken in the flour mixture.
- Once the oil is hot, add the chicken, being careful not to overcrowd the pan.
- Allow the chicken to get golden brown on one side and then flip once and cook for an additional 15 minutes or until the thermometer reaches 165 F.
- Remove to a rack-lined baking sheet and keep in a warm oven until ready to serve.
| Calories per Serving | 792 |
| Total Fat | 60.6 g |
| Saturated Fat | 13.1 g |
| Trans Fat | 0.1 g |
| Cholesterol | 115.0 mg |
| Total Carbohydrates | 27.5 g |
| Dietary Fiber | 1.0 g |
| Total Sugars | 3.1 g |
| Sodium | 658.4 mg |
| Protein | 33.3 g |