The 'Wet Hand Dry Hand' Trick Is The Secret To Easier Breading
Coating a food in breading before cooking it can bring textures and flavors to the table that nothing else can. But if you've ever tried to make perfect fried chicken at home, you know the three-step breading process can sometimes be trying. If you're not methodical in how you go about it, you can wind up getting tons of breading stuck to your fingers, slowing things down to a crawl as you have to repeatedly wash and dry your hands (and possibly the rest of the kitchen if you weren't careful about what else you touched). But there's a technique that can save you time, effort, and cleanup all at once: the 'wet hand dry hand' method.
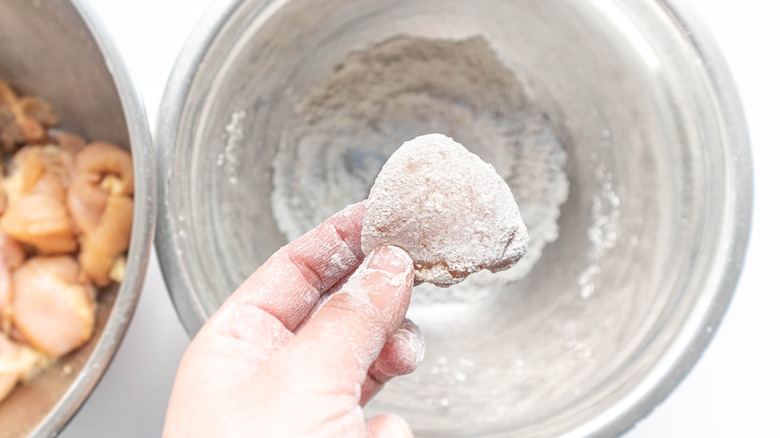
Essentially, wet hand dry hand is an organizational technique designed to make the breading process run as quickly, cleanly, and easily as possible. Conceptually, it's very simple: Use one hand for dry ingredients and one hand for wet ingredients, and never the twain shall meet. Use your dry hand to coat the ingredient you're breading in flour (known in recipes as "dredging"), then place it in your egg wash. Use your wet hand to coat the ingredient in the egg, then place it in your bread crumbs. Then use your dry hand again to make sure it's well coated before transferring it to your cooking vessel or prep area. Not only will this make things easier by reducing clean-up, but it'll speed things up, too.
The key is to be organized, careful, and efficient
There's a good reason chefs like Anne Burrell and Rawlston Williams espouse the wet hand dry hand technique: It works. Being organized and clean in the kitchen makes the cooking process easier and more efficient. This is the principle behind the French cooking trick known as "mise en place," and it also applies to wet hand dry hand.
There are some key tips to remember when practicing this technique. You should try to move the ingredients from one station to another as gently and carefully as you can rather than simply plopping them around willy-nilly, as this will help avoid getting the wrong ingredient on the wrong hand (or splashing them onto the counter). You also want to make sure to shake off the excess flour, and let the excess egg drip off, during their respective stages in the process. This will ensure your coating is consistent and you don't start getting too much of each ingredient mixed into each different bowl. Tossing the bread crumbs on top of your protein during the final stage and gently pressing the coating on will also help keep your dry hand dry, and ensure your coating sticks too.
There are lots of ways to make sure your coating is uniform

There are other tricks that can help you get the most crispy, consistent coating, too. Taking your protein out of the fridge and letting it sit for half an hour until it reaches room temperature before breading it is useful if you're frying, because cold food can drop the temperature of the oil, leading to an uneven cook and soggy crust. Patting your protein dry before you dredge it will also make the flour stick more uniformly, in turn helping the egg and bread crumbs adhere better too. And refrigerating your breaded proteins for 15 minutes really helps too, as it gives the breading time to adhere completely before frying.
Different types of coating stick to breaded food differently, too. A crust like corn flakes or dried bread crumbs might have a slightly harder time adhering to your protein (especially if the corn flakes weren't crushed enough before breading). But panko bread crumbs are particularly good for keeping a consistent coating that doesn't slide off when you fry it, or when you cut into it.